While I’ve loved putting together my puzzles and reading various books during quarantine, I figured I needed a cool project to work on to help pass the time. I decided to use my free time to convert my 2007 Honda CR-V into a car camper. I have done so to make road tripping in search of running spots just a little easier.
When I was creating my design for the bed, I wanted to make sure it was something that I could put away easily without having to completely dismantle it – something that would allow me the ability to utilize the backseats if needed.


Disclaimer: The design works perfectly, but you can definitely see some spotty handy work in the photos below. I am definitely not the most handy person, but I was able to make this set up with a bit of help from my brother. While the design was my idea, he was the brains behind piecing it together to make it work.
Materials
The materials we bought were the following:
- one sheet of plywood
- four two by fours
- deck screws
- eight hinges
In the end, we probably could have gotten away with only buying three two by fours, but it was nice to have the flexibility of the last one. We also bought separate hardware for the hinges, but if you’d like to save a few dollars this isn’t necessary. In total, these materials cost about $100.
In addition to the wood and hardware, I also bought two Rubbermaid bins for storage, a sheet set and a mattress pad. I splurged to get the nicer mattress pad instead of having to buy two. These three items cost me another $100.
In total, I was able to spend less than $200 on all my materials for the set up. This total does not include any camping gear I may need to buy to be fully functional on trips.
Measurements
I started by moving my seats to make sure they were in the right place for all my measurements. I set the drivers seat to where it needed to be while I was driving and the passenger seat I moved to where it would be if I were laying down for bed. For the backseats, I used the bins I bought and moved the seats to where the bins fit to allow the trunk door to close.
The previous owner was rear-ended so my trunk has a decent sized dent in it as you can see in the photos. I will share my specific measurements, but the dent may make them slightly different than another 2007 Honda CR-V and dimensions may vary based on the year of your car.
Set Up
My first cut was the trunk board, which I placed on the ledges on either side of the trunk. The measurements for this board were 30″ by 48″. I also rounded each corner so it would fit in the car a little better (sorry – they are cut off in the photo below). To make the board a bit more pleasant to remove, I sanded all of the edges so that I wouldn’t get splinters every time I moved it.

Next, I measured the space between the end of the trunk board and both of the front seats (for driving and for sleeping). I measured about 50″ of space overall and about 37″ to the drivers seat. I rounded those numbers down to leave a bit of space for the gaps that would come with the hinges. I divided my overall number by three so that I would have three evenly sized boards that folded on top of each other.
The number I came up with was 15″. My driving set-up would be 30″ and my sleeping set up would be 45″ – both numbers working out well within the space I had. I cut three boards at 15″ by 48″ and before connecting any of the boards, I rounded and sanded all of the edges.
Connecting the boards with hinges, we left about a half inch of space between each board. For the first two boards and the trunk board, we used three hinges and for the last board we used two. There was no logic behind this decision – we were only able to find eight hinges at the hardware store.
As you can see below, the hinges for the middle two boards must go underneath – this is so that the boards properly accordion fold on themselves.

As I said before, we replaced the hardware for the hinges and the screws and nuts we used poked through our boards. We ultimately cut off the excess metal and sanded it down with an edge grinder. If you choose to save the money or don’t have an edge grinder, I think using the screws that come with the hinges would work just fine.
The last step before being able to put the board in the car was to cut out notches so it would fold out and not get caught on the seat belt hook on the wall. We folded up the three 15″ boards and placed them perpendicular to the trunk board. From there, we used a jigsaw to cut 1.25″ in and 4″ down. With the three boards all folded together, these were on the top corners – when folded together they should all line up.

Supports
Next, we had to create the supports so that the bed wouldn’t collapse when my dog and I go to use it.
In the trunk, we placed a support across the back in the space on either side of the spare tire well. We cut two pieces at 14″ for the posts and one across at 45″. We screwed these three pieces together with the deck screws, but did not feel the need to attach them to our plywood. They were sturdy enough without doing so and it allows easier removal.

We then created three different supports for the front boards to prevent them from collapsing. The two outside supports, we cut a 14″ piece and connected it to a 38.5″ piece around where the trunk board crease is. It should pass under all three creases. In front, it went just barely past the last crease so they aren’t in the way of the driver seat while driving.
We then placed a two by four in the middle at 45″ long, but didn’t need to connect this to the floor. This middle piece is the support for the head piece and is movable so it is not in the way while driving.

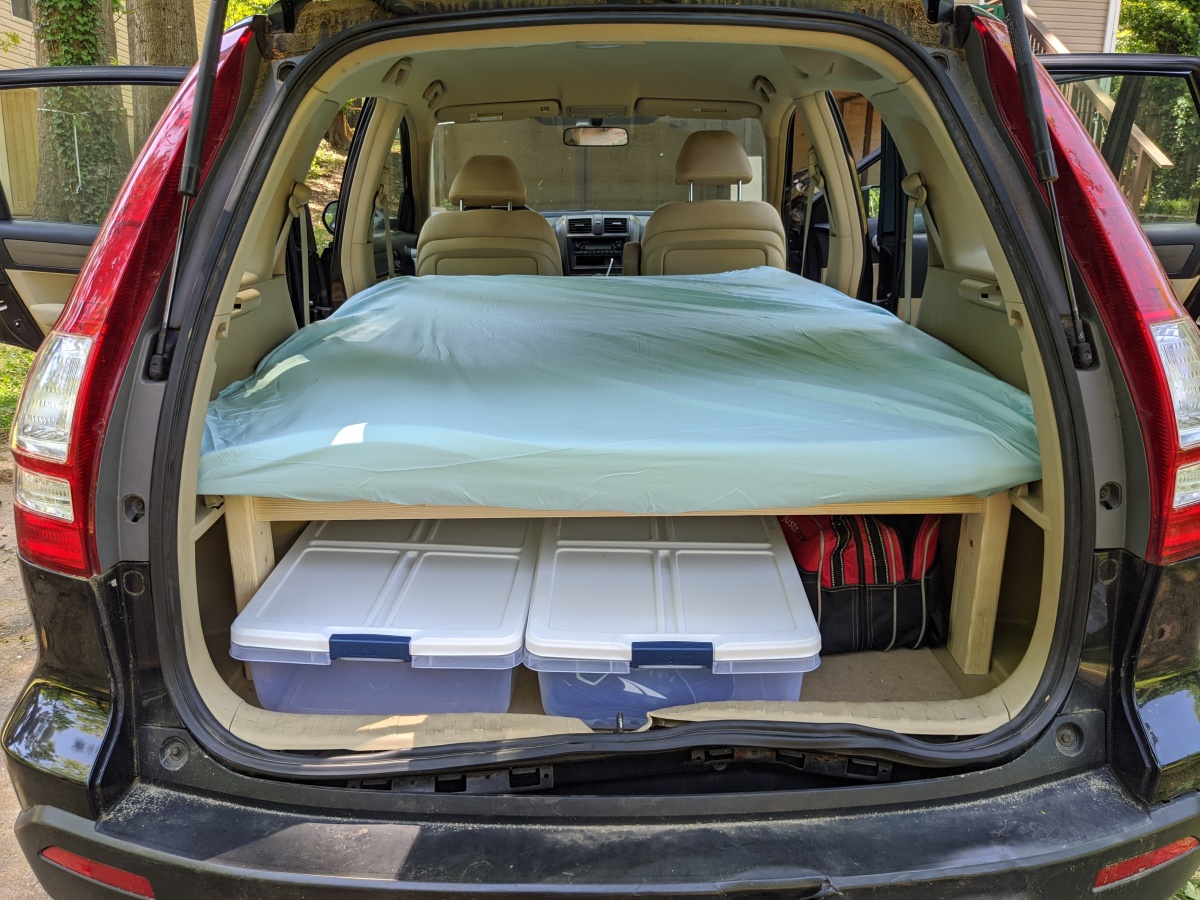
Our full size foam mattress pad was the perfect size for the 48″ wide bed and we placed a fitted sheet over the top that we were able to tuck in to keep everything in place. Our final sleep set up looked like this:

And folds up nicely to look like this:

The only other thing I need to add is curtains or some sort of material on the window so people cannot watch me while I sleep.
I am more than happy to answer any questions you may have on how to make this set up work. And keep an eye out coming up for a full packing list of what I will have with me on any future car camping trips!
